Nessus
This section will cover using Nessus Essentials by Tenable to perform vulnerability scans.
Table of Contents
- Overview
- Setting Up Nessus
- Creating a New Scan
- Performing a Scan
- Scan Reports
Overview
Tenable Nessus is a vulnerability scanner by Tenable. There are several versions of it. This section will cover the Essentials version.
Setting Up Nessus
To use Nessus, we can download it from the following link:
https://www.tenable.com/downloads/nessus?loginAttempted=true
This section will be using the Linux - Ubuntu - amd64 version. Downloading it will provide us with a .deb file.
Once downloaded, we can use the following command to install Nessus:
sudo dpkg -i Nessus-10.7.3-ubuntu1404_amd64.deb
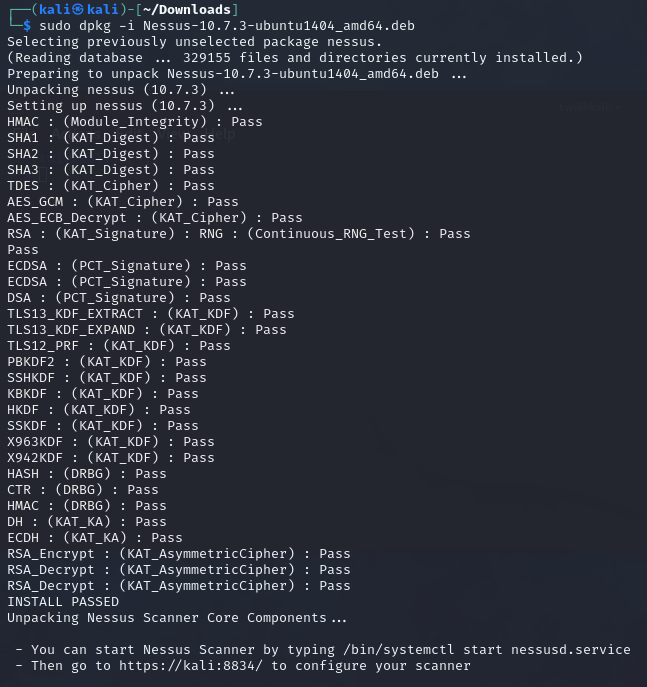
Once done, we can by using the following command.
systemctl start nessusd.service
Once Nessus is installed and started, we will need to register an account to obtain a free license key to activate and use the Essentials version.
https://www.tenable.com/products/nessus/activation-code
Once registered, we can navigate to https://localhost:8834 or https://<IP>:8834 if it is installed on a remote machine to setup the tool. Click the "Continue" button on the welcome screen as we can leave the settings at the default options. On the next screen, select "Register for Nessus Essentials".
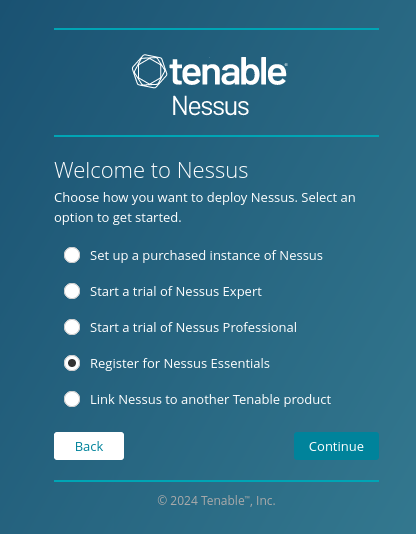
On the next page, we can skip it as we have already gotten our activation code. On the following page, input the code obtained earlier and wait for Nessus to initialise.
Once the setup is done, we can start creating scans and setting up the tool.
Creating a New Scan
To create a new scan, navigate to the scans tab and click the "New Scan" button the top right.

We are given several options such as "Host Discovery" to identify live hosts or perform scans such as the "Basic Network Scan" or "Advanced Scan".
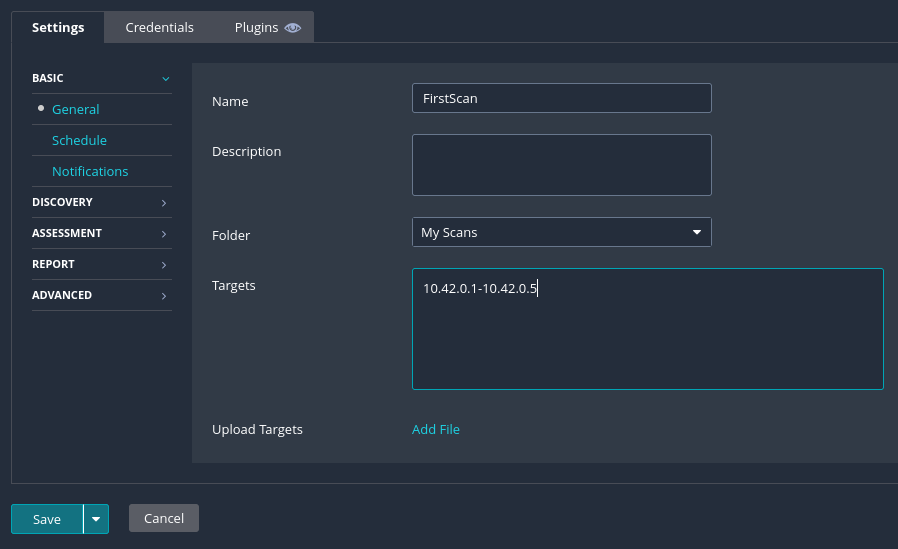
This example will be using "Basic Network Scan". To create it, click on the option and input the name for the scan and targets.
For example, the name of the scan will be FirstScan with the targets being 10.42.0.1-10.42.0.5. This will set the targets to 5 IP addresses from 10.42.0.1 to 10.42.0.5.
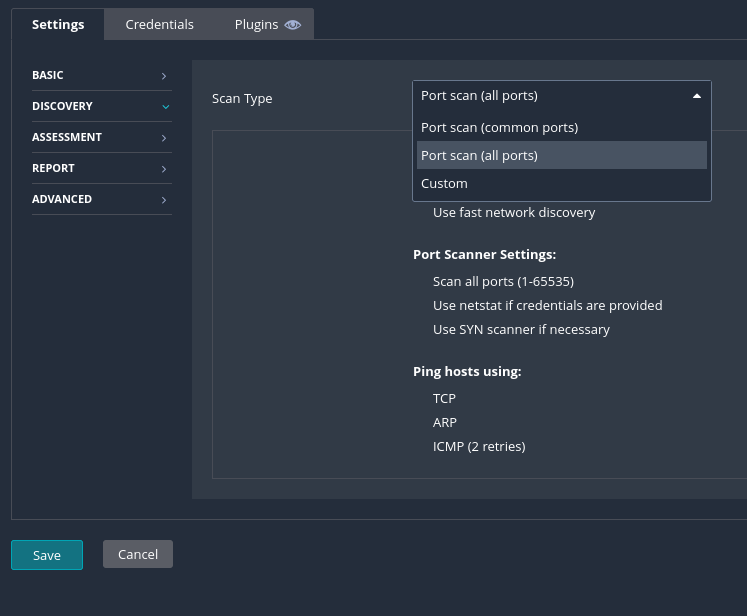
On the DISCOVERY tab, we can select the scan type. We can select from three options. For this example, set it to Port scn (all prots).
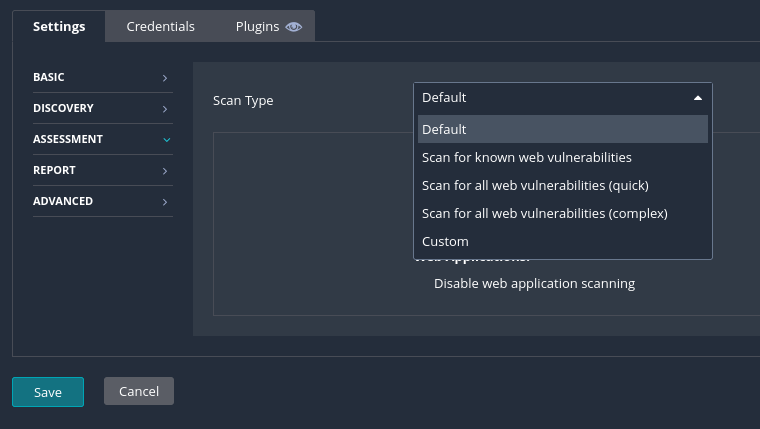
For the ASSESSMENT tab, we can choose what type of assessment that we want to perform. For this example, we will be using the default option.
In the reporting tab, we can set how much information and the type to output from our scans. For this example, we will use the default settings. The ADVANCED tab will allow us to specify the performance options on how Nessus should scan the targets.
Other tabs included are the Credentials and Plugins where we can specify any user accounts or plugins that we want to use.
Once configured, click the "save" button.
Performing a Scan
Once a scan is created, we can start the scan by clicking our created scan and click the "Launch" button on the top right.
Scan Reports
Once a scan is completed, we can choose to export a report in .pdf, .html, or .csv formats. The .pdf and .html reports gives us the option for either an executive summary or a custom report.
The executive summary provides the list of hosts, total number of vulnerabilities found per host, and a "Show Details" option to see the severity, CVSS score, plugin number, and name of each finding.
The CSV report allows us to select the columns that we want to export. This will be useful when importing the scan results into other tools such as Splunk.